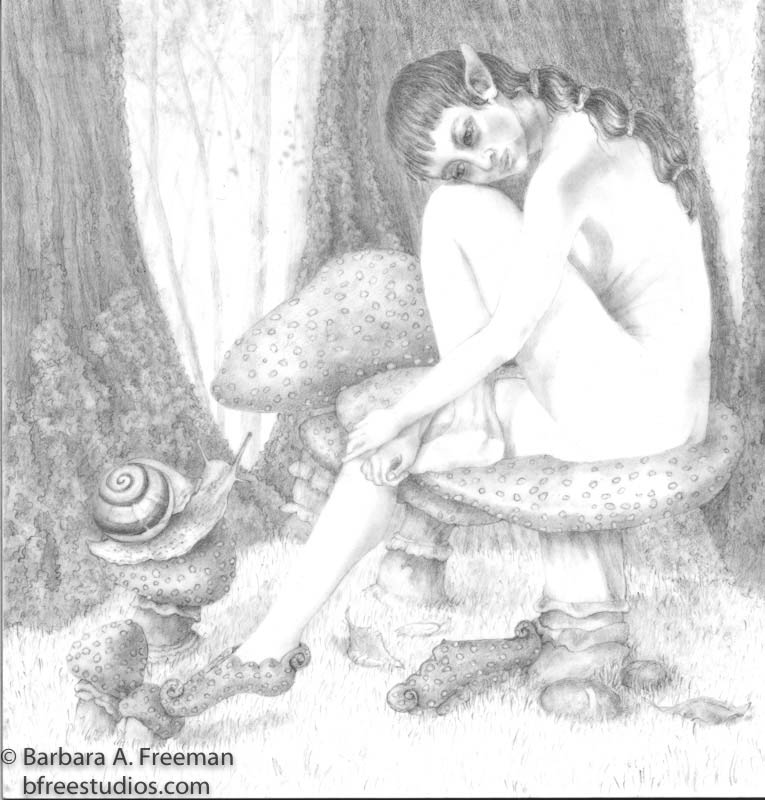
Five of my pieces, four Miniatures and one Small Work are in this year's 2020 Winter Show of Small Works and Miniatures at Parklane Gallery in Kirkland WA (map). This year their Annual Winter Show will be a 2-month event, November and
December. The show will combine the Small Works show and the Miniature show, which is usually held in the spring but had been cancelled due to COVID 19. Accepted artwork will be shown online and
in the gallery in two collections: Miniatures, which meet international
miniature standards, and Small Works. You can read more about international standards at the Miniature Artist of America, AMA site. This special exhibit of 250 small works and miniatures were selected from over 600 artworks entered from artists across the country! All accepted works can be viewed online and the Gallery will have a limited number of the work on the gallery walls. As space becomes available, more work will be hung. If you see what you like online, give them a call at 425.827.1462. All work will be for sale and these little treasures make the perfect holiday gift or stocking stuffer!
Showing posts with label Acrylic. Show all posts
Tuesday, November 10, 2020
2020 Winter Show of Small Works and Miniatures - Parklane Gallery Kirkland WA - I have 5 Pieced of Art accepted!
The Conversation © Barbara A. Freeman
4" x 4" Graphite on Claybord - Miniature
The Conversation © Barbara A. Freeman
4" x 4" Graphite on Claybord - Framed 5 3/8" x 5 3/8"
The Mermaid © Barbara A. Freeman
4" x 4" Acrylic on Claybord - Miniature
The Mermaid © Barbara A. Freeman
4" x 4" Acrylic on Claybord - Framed 5 3/4" x 5 3/4"
You`re Welcome Here © Barbara A. Freeman
3 1/2" x 2 1/2" Ink on Scratchbord - Miniature
The show will feature a wide variety of small and miniature artwork sure to please anyone on your Holiday gift list. Parklane Gallery will be observing WA state's current safety requirements. Parklane Gallery is located in the heart of beautiful downtown Kirkland at 130 Park Lane, Kirkland WA. 425.827.1462. Free parking is located below the Kirkland Public Library. You can view the artwork on the Parklane Gallery 2020 Winter Show website and from there by clicking on Miniatures, Small Works, or by Artists to search or browse. You'll want them all!
November 5th to January 2nd, 2021
Open: Thursday 1 to 5
Friday and Saturday 10 to 6
Sunday 1 - 5
They Come at Night © Barbara A. Freeman
4" x 4" Ink on Scratchbord - MiniatureThey Come at Night © Barbara A. Freeman
4" x 4" Ink on Scratchbord - Framed 5 1/4" x 5 1/4"
Under Scrutiny © Barbara A. Freeman
6" x 6" Ink on Scratchbord - Small Works
Under Scrutiny © Barbara A. Freeman
6" x 6" Ink on Scratchbord - Framed 9 1/8"x 9 1/8" Thank you for taking the time to read about my work. These times are very stressful and art may be the best gift to give yourself. Keep joy in your life and love in your heart with art, music, and your loved ones, both human and animal. Stay safe and be well.
Wednesday, April 22, 2015
Seaside Art Gallery's 24th International Miniature Art Show
The 24th Annual International Miniature Art Show at Seaside Art Gallery is happening online now. I missed submitting to this show last year and am so pleased that I am able to submit work this year! Each year the show exhibits around 550-600 works of art by talented artists from all around the globe. Some of the world’s most renowned miniature artists participate each year! This show has a wonderful variety of fine art miniatures!
Above are my three works in the show, shown in their frames. They are, The Custodian, Sure Signs of Autumn, and Smooching.
This great show is a favorite of mine. I love the presentation of the entire show online. Seaside is a very organized and well run gallery. Not only will you be able to click on the work to see an enlarged view, but if you click on the details, it tells you the artist's name and where they're from. There is also a thumbnail of the work in it's frame which you can click on for an enlarged framed view. The clarity of the image is perfect AND you can put it in your cart and buy the artwork online! Just click on The Custodian, Sure Signs of Autumn or Smooching to see my work on Seaside's online gallery. If you want to go back to the rest of the show, just click at the bottom, 24th International Miniature Art Show, it will take you there. Enjoy!
The Custodian © Barbara A. Freeman
Graphite and Mixed Media on Claybord 3 5/8" x 3 5/8"
Sure Signs of Autumn © Barbara A. Freeman
Acrylic on Claybord 3 5/8" x 3 5/8"
Smooching © Barbara A. Freeman
Acrylic 1 3/4" x 2 3/4"
Seaside Art Gallery's show is one of the top five national miniature shows that you can see in person and online. The exhibition runs from May 2nd through May 30th, 2015. The Artists Reception is May 23rd from 7 to 9 PM.
The online exhibition starts upon arrival of each artist’s work. When the artwork arrives in the gallery, it is examined, measured, photographed and posted. Miniature art is often referred to as "the little jewels of the art world" and enjoys continued growth in popularity worldwide. All beautiful jewels, they'd make the perfect gift for MOM! I hope if you are in the area, you will go see this great show! Seaside Art Gallery, 2716 Virginia Dare Trail South, Nags Head, NC
**Please Note: The artwork for the 24th IMAS is currently for sale. If purchasing online, please be sure to click “apply coupon” to activate the free shipping. However the art must remain at the gallery until the end of the show, at which time Seaside Art Gallery will ship it free within the USA. Call or email us with any questions concerning the show, or other gallery art at 252.441.5418, or 800.828.2444. Email: info@seasideart.com.
Thanks for taking the time to read about the shows I'm participating in and my work. Spring is in the air and lots of things happening to me here on the home front. I'm staying busy creating new work and am submitting to a few more shows this year, than last. It's all been a slow process, but moving along. A big change is happening this summer when will be welcoming our daughter, Gina, (and her little dog too!) who will be leaving the hot state of TX to come reside in the cool Pacific Northwest. We'll be meeting up with her in TX and having a fun road trip back here. We're hoping to visit the area around Santa Fe and elsewhere on our way back home. It's all still in the planning stage but I'm sure we will have lots of fun and inspirations on the trip there and back. We will be so pleased to have her here!
Monday, April 11, 2011
Two New Miniature Art Works
Mister Pelican © Barbara A. Freeman
Acrylic, 3 1/8" x 2"
Mister Pelican was the result of my trip to Dunedin, FL this last January when I went to see the Miniature Art Society of Florida Show. One afternoon Wayne, daughter Gina and I took a walk along the water and around the bridges to where folks were fishing. While there, several pelicans landed and posed for us. I had several photo references to work from, but was attracted to this composition because of the curve of the pelican's neck and the proud look in his eye. I also liked this format and thank Wayne for use of his photo. I have several other interesting poses of pelicans so who knows, there may be more pelican paintings down the road.
Being there brought back memories from when I lived in Central Florida and our family would take day trips to the 520 bridge at Merrit Island near Coco Beach to go fishing. It was a fun day just hanging out, feeding the fish more than catching them! I also remember when we used to go camping at the "Jetties" south of Cocoa Beach and fish all night. We'd climb out on the rocks and catch sheepshead and whatever else was running, then cook them up for breakfast. The pelicans were always part of the landscape. All that has changed and the Jetty is a park now with fees for everything. I'm glad we were able to enjoy it when the only folks there were fishermen and surfers.
Pastoral Afternoon is a graphite on film work with colored pencil on the back side of the film. Having the colored pencil on the back side gives the work the look of a faded photograph. The scene reminded me of my childhood in a small town in PA where I lived. There was a field behind my house where I loved to roam and daydream during the summer. There were cows in that field too but always far off closer to the farm end of the meadow. I used to slip under the barbed-wire fence brushing past the spearmint plants to get to the other side. There was a creek down at the bottom of the hill where I would go with my little dog Ginger. I loved spending my time in that field letting my imagination run but always keeping my eye on the cows, that they didn't get too near and block my way back home. Even now when I smell fresh mint, I can remember how it felt having the whole day to run in that meadow, to expore and dream!
Saturday, May 8, 2010
Mom Illuminated, Happy Mothers' Day!
In honor of Mothers' Day I thought I'd share the new miniature art piece I did for my Mom and Mom-in-law. I tried to figure out a way to do one and then transfer a copy for the second one. I tried several things, but for whatever reason, the ink from my copier didn't want to transfer to the gesso. After printing on several different surfaces, I printed my image on to a piece of Stonehenge paper which looked the best. I then painted over the top of the image, repainting the whole thing, but it was much easier because I had the basic colors already in place. The paper was very absorbent and created a soft almost pastel look. There are even some things I liked better about the second work as compared to the first. I was satisfied with the way they both worked out. The second one looks brighter, and it was a bit more than the first, but it was also a sunny day when I did the photo shoot. Anyway, I think both Mom's will be happy.

Mom Illuminated, Framed © Barbara A. Freeman
3 5/8" x 3 5/8" Acrylic on Strathmore Illustration Board

Mom Illuminated, © Barbara A. Freeman
3 5/8" x 3 5/8" Acrylic on Strathmore Illustration Board
Mom Illuminated, Framed © Barbara A. Freeman3 5/8" x 3 5/8" Acrylic on Strathmore Illustration Board
Friday, February 19, 2010
Latest Miniature Art, and Now an Associate Member of MPSGS!
This is my latest miniature work, just finished the final fixative coat on it yesterday. Now, it's ready for scanning, then finding or cutting a mat! As you can see, I am still on my crow and clock theme here. Thanks to the Arts Council of Snohomish County for the Of Clocks and Crows Exhibit that I did my work, Finding Time for, I have now done four works with a crow in them. Oh, I forgot, there is a crow in both of my Buddha paintings, but I did those two before the Clocks and Crows show. Still, I love getting inspired with a subject and then having it repeat in more work. It creates a series and allows me to further explore that subject.
This one, still untitled, is done on * Dura-lar Matte film with colored pencil on the underside for the watch and the interior of the tree. The chain and a bit of highlight on the eye and watch were done with acrylic, with a tiny bit of gold. *Check out the review I did on Dura-lar Matte film on the link at Dick Blick.
I love drawing trees, they have so much character and great texture. Just after I completed this, I knew I had to move on, (deadlines, deadlines, deadlines,) and I am now working on a silverpoint miniature continuing the tree with all it's mystery theme. This one though has a rabbit featured in it! Hopefully it will be a successful piece. Silverpoint does not allow you to erase, so you really have to know where you want to put your marks and have them work! So far, it's going well. I'll keep you posted.
More wonderful news... I have been invited to become an Associate Member of the Miniature Painters, Sculptors and Gravers Society of Washington D.C.! (MPSGS) This is the oldest Miniature Art Society in the US (founded in 1931) and is the second oldest in the world! The Royal Society of Miniature Painter, Sculptors and Graver in London, England is the oldest. The membership is by invitation only and decided by a vote of the other members. To be eligible, you have to have exhibited in three annual Society shows or have been awarded a first, second, or third prize at any Society exhibition. I am so honored!
As always, thank you for taking the time to look at my work and read my blog.
Wednesday, February 10, 2010
Always Illuminated, New Work of Miniature Art
As promised, here is the finished work, Always Illuminated! It started out as a first attempt at egg tempera, (First Attempt at Egg Tempera blog post), but alas, that didn't succeed. This piece is from that design with some additional work all done in acrylic. It still needs to have the master scan done so the "Always" has not been completely attached to the miniature landscape. Each piece will be scanned separately. This is to show how it will look when all together and which frame I have chosen. It will not be matted, but will have spacers between the glass and the artwork. That is so that the art does NOT rest on the glass. It was done on 100% rag illustration board using acrylics, including gold and iridescent colors. The only thing I would do differently next time is to make my background much lighter. The varnish seemed to darken the work more than I intended. But otherwise, I am happy with the final image. I loved painting the tiny landscape with the fields and trees. The castle was great to do. I mean, how often do you get to add a castle to your landscape?
I wanted the work to be more than just the word, so I added a landscape to rest the word on. I used the same surface and background color. Because the letter design used the autumn leaf and colors, I tried to bring that same theme and color to the landscape.

The word is attached to a piece of rag board with acrylic gel medium to lift it slightly when attached to the landscape with the same gel medium.


Above is the frame I have chosen for it. Sorry, it is showing more of a shadow at the top than it will have when framed. Thanks for taking the time to read about my new miniature work. I'll let you know when I have decided which upcoming show I will be submitting, Always Illuminated to. I really had fun doing this, I hope it comes through in the work! It will be interesting to see what kind of response I get with this. I could see a series of illuminated words!
I wanted the work to be more than just the word, so I added a landscape to rest the word on. I used the same surface and background color. Because the letter design used the autumn leaf and colors, I tried to bring that same theme and color to the landscape.
The word is attached to a piece of rag board with acrylic gel medium to lift it slightly when attached to the landscape with the same gel medium.


Above is the frame I have chosen for it. Sorry, it is showing more of a shadow at the top than it will have when framed. Thanks for taking the time to read about my new miniature work. I'll let you know when I have decided which upcoming show I will be submitting, Always Illuminated to. I really had fun doing this, I hope it comes through in the work! It will be interesting to see what kind of response I get with this. I could see a series of illuminated words!
Wednesday, January 20, 2010
New Miniature in the Italian Landscape Series, "Over and Beyond"
My latest miniature painting is another in my Italian Landscape Series. I had started this one a while back, but didn't like the colors in the sky, nor the way the light was hitting the tops of the mountains. I put it away and moved on to another work. I find it's good to do that, when a piece just doesn't grab you but you have put so much work into it. This one had been at that point. Meanwhile, I was thinking about what I wanted to do next, when I saw it sitting there on the miniature easel where I prop them to "age". I picked it up and just started working on it. I think it's good sometimes to put all the photos and references away and let your painter's eye take over. Once I got the sky area worked out, the rest was the fun part of just refining the details. I'm very happy with it now. It still needs the isolation coat and varnish. When that has all been done and a frame chosen, I'll post it again. Thanks for looking and taking the time to read this.
Tuesday, January 5, 2010
First Attempt at Egg Tempera
First, let me say, Happy New Year !! 2010!! It's hard to believe we're already in the first week of a new year. Where does the time go?
Now on to new work! After I finished the stone with the illuminated G, I needed something that I could paint in miniature using egg tempera. I wanted to keep it simple so I decided to do another illuminated letter. I didn't have as much of a problem as I thought I would with cleaning the egg yolk for the medium, (thank you Mona for your demo)! I found that using my hands to clean off the yolk worked better for me than the paper towel though. Until I know better what I'm doing, I am using watercolor instead of powdered pigments, except for titanium white. My surface was a 100% rag illustration board. My friend Janie Olsen ordered some of the True Gesso panels and is bringing me one on Friday. The True Gesso panels are not made with acrylic gesso, but made with the rabbit skin glue formula and are perfect for egg tempera painting.Below is what I did and the problems I ran into. I think the hardest part was knowing when I had enough medium mixed with the paint. Also, I noticed the paint that was already applied was fragile and could scratch easily. I used thin paint to seal the surface and then on top of that I would use cross hatching and thin glazes. Sometimes the paint would lift off if it wasn't completely dry so I would work on another area.

I have continued to build up color and light. Here is where I started noticing problems. There is a flaky place just above the "a" and "y". Then the same thing started happening on the lower left corner. I was going to repair it on the bottom left corner by building it back up, but thought I'd leave it for awhile and see if anyone has any solutions. I also wonder about just using some of the medium alone on top of the flaky place above the "a" and "y" to see if it would stabilize it.
I continued to work on it because I was hoping to save it. I loved the glow and the colors. You can see the flaking places really well here as I used my brush to lift them off hoping I could repair them. I started to repaint, but gave up because I wasn't sure if I would run into this elsewhere as well. At this point I had already spent too much time without any assistance. I would like to know if I am on the right track, if this flaking is because I've not used enough egg medium, or if it's because I added too much paint or too many layers without it being dry? From the research I did, it sounds like the answer could be YES to all of them. But I don't know which and I'd like to avoid it again!! I'm having Janie look at it when she comes over. She's done some egg tempera and took one of Koo Schadler's one day workshops. I'm hoping she can at least give me her opinion. Any other suggestions would be welcome. I know Mona Diane Conner does beautiful work in egg tempera and sometimes visits here, so maybe she can give me some insight. I will try again. However for now, I need to move along and get some work finished for all my miniature deadlines coming up!
This is the new attempt so far of the same image using acrylics. I'll post the finished work when it's done. I enjoyed using the egg tempera so far and I'll be going back to it when I get a slot of time to try again. I think it's probably like anything else that you do. You have to do it a lot till you work out the problems and get better at it. So for now, I'll put the egg tempera on pause. Thanks for reading this post.Tuesday, October 27, 2009
Final Phase, Bringing it all Together!
Work in Progress, Acrylic on Gessobord, 4" x 4"

#12

I worked on darkening the edge of the large rock, adding the holes, giving them depth. I also needed to pay attention to the rocks on the right side, give them some detail without making them too important. I added shadow areas throughout the holes and rocks.

#13

I further refined the dark forest, adding tree trunks and branches, touching up the sky holes, bringing some trees forward, moving some back. I also added some cliffs on the far right side. Here is a closer view of the rocks in the foreground.

#14

More branches were added here as well as some leaves. I also worked the roots on the upper rock on the right.

#15


The front edge of the large rock has been further defined with the under shadowing and carried over where it meets with the other rocks. I like the shape and curve of this opening. All the details have been added and it's just a matter of looking to see what else needs a bit of tweaking.

#16
In one of my photos of the area, I noticed a seagull. I really didn't see it at first, except when I was trying to see some other detail under magnification, there it was. I thought it would be a great addition. However, the seagull was not easy to paint! At first I just couldn't get it to look real, I did not want the cliché of a "bird". I realized my difficulty was the surface, it wasn't smooth, there was too much drag on the brush. So after letting the area dry, I added a thin layer of soft gel medium diluted with water, like an isolation coat, and let it sit overnight. The next day I was able to work the bird much easier, the brush moved freely on the surface. I was able to create the shape of a bird with some light and dark areas suggesting the body and wings. Whew! it was so tiny to paint! All I have to do now, is put the isolation coat on, and then after it dries, varnish and frame it. Oh, and yes, the fun part...a title!

#17
Above is the final work in the frame I have chosen to put it in. I am pleased with the outcome. I really like the way the seagull breaks up the darkness of the forest and pulls the eye through the work. What struck me was the serenity of this place. There were so many ways for the senses to be stimulated, the feel and look of the different textures of the rocks, the contrast of the dark forest and the overcast sky. Not seen in this painting, but can be imagined, is the water of the sound on the left, the sand and pebbles and tidal pools below. It was chilly, but the air was fresh. I can't wait to go back!!
I'll be posting the final image on my website and here as well when it gets scanned and I give it a title! This work was done for the Miniature Masterpieces and More exhibit coming up at Kaewyn Gallery's holiday show. I'll be talking about that in the near future, so stay in touch.
Thanks for looking and reading about my process. I have done this for myself as well as anyone else who is interested. I think it will be good to have as a history, not only of how I worked at this point in time, but what I thought about it. I do want to make it clear that this wasn't posted in real time. I took a photo every day before I started working. Then I took the best photos in their order and posted the work a few at a time. I take a long time on each work, too long! If I posted them in real time, it would take forever between posts. Therefore I chose to do it this way. I wish I were faster, but I'm not and that's the way it is. Besides, it's the journey that's important! Now, next, graphite on film.
I'll be posting the final image on my website and here as well when it gets scanned and I give it a title! This work was done for the Miniature Masterpieces and More exhibit coming up at Kaewyn Gallery's holiday show. I'll be talking about that in the near future, so stay in touch.
Thanks for looking and reading about my process. I have done this for myself as well as anyone else who is interested. I think it will be good to have as a history, not only of how I worked at this point in time, but what I thought about it. I do want to make it clear that this wasn't posted in real time. I took a photo every day before I started working. Then I took the best photos in their order and posted the work a few at a time. I take a long time on each work, too long! If I posted them in real time, it would take forever between posts. Therefore I chose to do it this way. I wish I were faster, but I'm not and that's the way it is. Besides, it's the journey that's important! Now, next, graphite on film.
Saturday, October 24, 2009
Next Phase: "Work in Progress", Acrylic on Gesobord
The work continues.
* Note, some of the images are under the magnifier for a closer view.
I've given the overcast sky the solid, flat look I was after without it being too stark white or too dark. I'm still adding values and defining shapes, overall.
More tree branches which help break up the sky and texture on the trunk of the tree, are seen here.
Oh no! The color was too dark and started to loose the texture I wanted. I ended up wiping off the paint and letting it completely dry. (see the white spot on the rock)
You can see here where I was able to repaint the color and start to give it form again. It was another of those flat places where I wanted to blend the surface edges but instead, overworked the area. I hate when I do that! But it has been saved and I am moving on.
Next you can see where I've started to lay color on the rock in the foreground. When I paint, I work from the larger area, then gradually add more values and outlines of shapes of objects. I work all over the surface at the same time and try not to add too much detail in the beginning, just enough to see where I am in that space. I've found if you get too caught up in the detail too soon, you often end up changing it anyway.
Above is a closer view of the detail on the surface where I had to redo the basic color. Also, you can see the great textures of the tufoni rock formations.
I'm happy with the trouble spot that I reworked. I can see the work is going in the right direction now and it's time to start sharpening up areas and loosing some edges. Then I get to do the fun stuff. Next, the fine details!
Tuesday, October 20, 2009
Work in Progress, What I'm Painting Now
Here's a preview of the painting I'm working on and how it came about.
Silverpoint on Multimedia Art Board -4" x 4"(Rejected by me as being too dark and surface not smooth enough)
I did this image as a silverpoint drawing, it was my first silverpoint. I really like how it came out except as I've stated in an earlier silverpoint post, I was tinting the ground too dark. Also this one was done on multimedia art board and I didn't like it as a support, it seems to be too bumpy for a miniature. I now know it can be gessoed and sanded smooth prior to using the silverpoint ground. (So much to learn and since I still have some of the Mulitmedia Artboard left, I may try that!) Anyway, I really liked this image in silverpoint and I am going to do it as a larger silverpoint work later. I already have some very nice illustration board prepared with silverpoint ground, ready to go. However, that will have to wait because I do have another miniature show to submit work to at Kaewyn Gallery's, Miniature Masterpieces and More* annual exhibit in December. (It's an invitation only for the submissions and I'm always happy to be invited to participate in this group show.) *More on that later.
Several months ago, I decided to paint this same image, as a miniature. I ran into trouble with the surface in blending the colors in the sky area. I'm not sure what the problem was, but nothing was turning out the way I wanted! So I put it aside and worked on something else. Now I am back to it and so far it's going really well. (As it should since I am very familar with every curve and shadow in this piece!) Notice the mess I made of the sky in the one on the right! That's after I sanded and reapplied paint, then sanded some more! Definitely time to put this one in the reject file! I do keep rejected work, however, because it's good to have as a reference. A reminder of what worked and what didn't.
In the above image, I laid in the shapes and darks of the forest. The rocks and tree forms have been outlined, with a few values added. The sky area has been covered with the first thin layer.In the above stage, I've laid more values on the front rocks. The forest has been defined further and another layer added to the sky. I find the areas where I get myself into trouble is when I have to blend a large smooth flat space, as in the sky. The paint starts to pick up and then it becomes uneven. The more I paint, though, the better I am able to get past these annoying mishaps! I become more mindful of using a lighter touch and not to over thin the paint. Oh, and to breathe!

#4
In this one, you can see the full view of the surface under magnification. You can see the rocks are being defined further as well as the tree with the small white branch. Still a lot more work to do, but so far, it's coming along without problems! I'll be back soon with more updates. Thanks for looking at my work in progress, untitled for now.
Subscribe to:
Posts (Atom)