I am once again participating in Seaside Art Gallery's 19th International Miniature Art Show in Nags Head, North Carolina. It's one of the top three miniature shows in the USA. This nationally acclaimed show usually exhibits around 600 works of art by artists from all over the world. Some of the most renown miniature artists participate each year. All accepted work, including my three pieces, is currently available for pre-show sales on their exhibit website. The show runs from May 1st through June 5th, 2010 at the Seaside Art Gallery, 2716 South Virginia Dare Trail, Nags Head NC. There will be an open reception with many participating artists in attendance, on May 29, 2010 from 7PM to 9PM. The Pearl will be catering the event and there will be an awards presentation during the reception. Sure wish I could be there!
If you are visiting the area, add this great Miniature Art Exhibition to your must do list! While you're there, be sure to check out my three miniatures, The Key, "Rhodie" with Bee, and my new acrylic painting, "Peek a Boo" .
I am currently working on a gift for my Mom and Mom-in law for Mothers' Day. I hope they work out, there's not much time! Also, I'll have more to say later on other shows and festivals I'll be participating in this spring. Thanks for taking the time to read this. I hope all your days are filled with beauty!
Wednesday, April 28, 2010
Wednesday, April 21, 2010
Graphite on Dura-lar Matte Film WIP Completed!
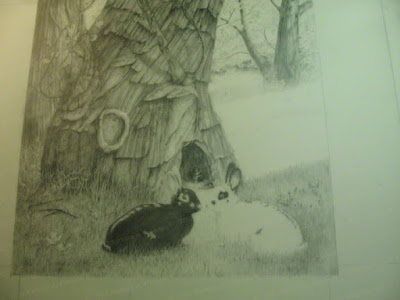
As you will see, this has gone through some changes since my last post. I decided the inside of the tree wasn't happening for me. I didn't like the rocks, they were too distracting, taking away rather than adding interest.
You can see in the photo above, my solution was to darken the interior and rocks, to lessen their importance. Yet, I still didn't think this was how I wanted it to look. I stopped for the night to let it rest and see it with fresh eyes the next day.
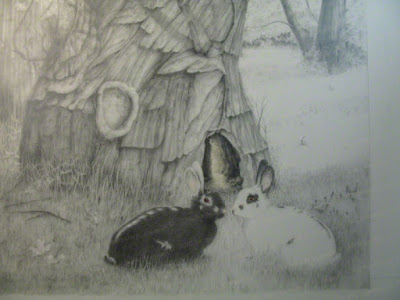
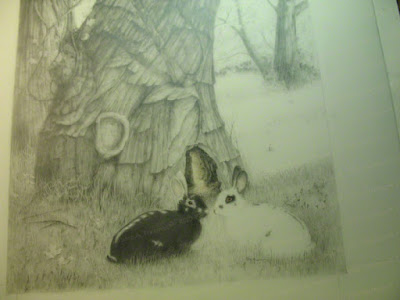
Next day, I still didn't like it, so I took a chance and changed it. Getting rid of the rocks and opening up the passage allowed the light to come through. Now there was a place for the rabbits as well as the viewer to escape to.
I continued to clean up some areas and add more darks. The black rabbit needed to have the dark fur smoothed. I then flipped the page over and worked on the underside. Adding some graphite to the underside of the black rabbit made the blacks richer and the strokes more even.
This is when I also started to add a bit of color to the rabbits ears and the inside of the tree.
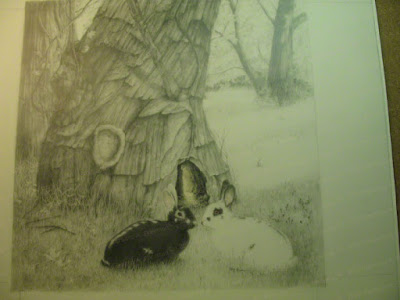
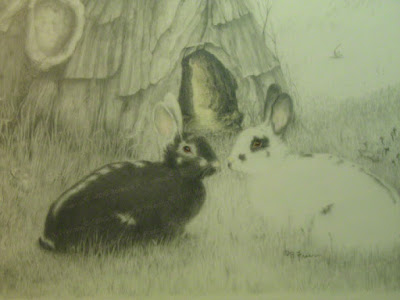
The above is a closer view of the two rabbits and the inside of the tree. In the finished work below, I lifted up some of the graphite on the inside of the tree and added a bit of warm sienna colored pencil to the light, extending it out to the rabbits fur. I did some further defining of the body of the two rabbits and added a touch of acrylic color for the two eyes. The tree seemed too bent, so I widened it with some more bark on the right side, and also darkened the left side. The finished work is below.
Below is the finished work in the frame I'll be using. I wasn't sure how this piece was going to turn out. I did not intend to have two rabbits, and didn't know what I was going to do with them. I knew I didn't want to put a door in the tree, but the tree was going to play a role in the scene. I knew that having rabbits as a subject could end up being too cute. Cute was not what I wanted either. I think the two rabbits mirroring each other has helped to make it more mysterious rather than cutesy. Or at least I hope so! However, how can rabbit NOT end up being cute! I'm happy with the results. Thank you for following along with me on this.
Graphite and Mixed Media on Film, 7" x 7"
Saturday, April 17, 2010
Graphite on Dura-lar Matte Film WIP Update # 2
Finally, I've gotten a batch of my work shipped and two batches delivered! One more delivery to go! I'll say more about that after I've completed this piece.
I decided not to enter this work into the show with the deadline of April 16th, and instead, I'll enter it into the one with the April 23rd deadline. It was almost finished enough, but enough wasn't where I wanted it to be. There was more that needed to be done to take it up a notch. Here is more of the progression.
Above, I've started bringing the drawing down into the grasses on the left side and adding the knot hole on the front tree.
I had gotten a lot of work done in the above photo, adding more to the front tree and drawing in one of my subjects.
I'm not sure why I decided to do what I did here, but after spending some time looking at it, I decided the piece needed something more. I love the spots on the rabbit and the way his eye is surrounded with the dark fur. It came to me that the reverse would be interesting, so I gave him a twin, or mirror image.
You can see a close up of the two above. Trying to reverse this rabbit was a challenge, especially doing the eye.
Above is a view under the magnifier to work on the rabbit's eye. I am using my 0.3 with a darker, softer, lead.
This photo is current with where I am now in real time. You can see why I wasn't satisfied with calling this finished, but it is so close. I'm going to add color on the reverse side in places and I'm not sure if I like the rocks inside the tree. I've added the grasses and leaves in the foreground. I still think the opening inside the tree needs work.
I hope the next time I post, this will be a completed work with a title, (the hardest part)! Thanks for taking the time to read this and see my work in process.
Tuesday, April 13, 2010
Graphite on Dura-lar Matte Film WIP Update
While I'm in the process of framing, almost finished thank goodness, I thought I'd show the progress of my current work.
This first photo as in the last post photo shows my tools and photo reference with the addition of the putty. I use it to lift up the graphite when an area is too dark, or to create texture. The putty is the dirty looking bit on the edge of my drawing easel. It's very useful for cleaning up areas. I also use it to hold my work in place on my drawing surface. I sometimes use a tiny piece on the tip of a *blending pencil. It's something I came up with when working with miniatures and needing to get in tiny places to clean up the graphite. It a very useful thing to keep around in your studio. The downside is it can make oil marks where it sticks, so don't let it sit on your art work, AND, don't get it in the carpet, voice of experience!!
* The Prismacolor Colorless Blender pencil has no color, but has a firm tip which is used to push the colors together or soften edges in colored pencil work.
I've made a lot of progress here. You can see where I've added the tree in the background, right side, as well as worked on the tree on the left. I've also added some twisted branches extending from the knot on the foreground tree.
On the above photo, I've worked on the larger tree, drawing it further down the left side. I also worked more on the upper right background adding some foliage, showing some dark shadows and defining some grasses.
Because I've been framing and getting all my new miniatures ready for the shows and my website, I've not had time to work on this. I'm hoping to do so this evening. I'm a bit further along in the drawing than this post, but almost caught up in real time. I hope to share more progress photos soon. Friday is my deadline for this to be finished. If I don't make it, I have another show I can submit it to on the following week and I know I can make that! Either one will be fine.
My newly titled and scanned works are up on my website in the Miniature Gallery, as well as the one metalpoint in the Drawing Gallery. You may notice I've added a few changes from when I posted them here. I'll be showing them framed later when I submit them. Thanks for taking the time to read this. Your comments are always appreciated.
Wednesday, April 7, 2010
Graphite on Dura-lar Matte Film WIP
While I've been madly getting my work ready for the four show deadlines this month, I thought I would share a new work that I'm also desperately trying to finish!! I am currently working on a new small work, done with graphite on Dura-lar Matte film. You may recognize the characters I'm using as they have appeared in my work before. This will be a 7 x 7 inch, square format, with the same set of trees with a rabbit, so far, as the star instead of a crow this time. The rabbit is the same one that I've used in two of my new silverpoint miniatures, shown here in earlier posts. In this work, his pose is slightly different, with his head turning a bit more in the viewer's direction. I'm not sure where I'm going with this yet. I'll just have to let it unfold.
When I am working with subjects that I like, I tend to want to continue to work with them, to further their poses and settings. They are never exactly the same and instead evolve in their shape and story. I hope you like this one and follow along. I'm keeping my fingers crossed that I don't run into any problems and can manage to finish it in time for my deadline!
Here you can see more of the tree's texture added as I moved down the surface. I've been very careful not to get the marks too dark to begin with.
This shows the photo I'm using for reference. I've included the eraser, brush, to whisk away bits of graphite dust or lint, and I use the piece of soft cotton fabric to rest my hand on to protect the surface from oils and scratches. My pencil is 0.3 HB. I'll switch to harder and softer leads as the work progresses. Thanks for taking the time to read this.
Thursday, April 1, 2010
Crow Series
This is a post to show my series of graphite drawings featuring a crow or crows. My friend, Mona Diane Conner has invited me to share my series of crow drawings to the Facebook Group, Birds in Art. There are so many beautiful images of birds on this site, so many talented artists and bird lovers!
In this series, the crow is part of the landscape, usually the focal point, but sometimes used as a symbol. I don't post my images on Facebook. If I want to announce new work to my Facebook friends, I post it with a link to be viewed here on my blog. Therefore, I have collected this series of work in a new post, in the order as created. If you would like to read my process or thoughts about each piece, you can click on the title of that work for it's blog link. Please note, you may have to go to the bottom of the link to find the matching blog. Thanks for looking and thank you Mona for suggesting it!
Fine Art Miniature, The Time Thief © Barbara A. Freeman
Graphite and Mixed Media on Film, 2 3/4" x 3 3/4"
This last work, above, is the latest work in graphite with a crow, to be titled soon. You can see that I've used the same crow twice in two of the works. They are everywhere until I get my camera to get new shots!
I've also included three works done in acrylic that the crow is used as a symbol.
Buddha in Austin, A Personal Altar*, © Barbara A. Freeman
Acrylic on Gessobord, (painting continued on deep sides and top)
Stones, Fossil and Root Fibers, 8" x 6" x 4" (*to see other views of this click on the title)
Acrylic on Gessobord, (painting continued on deep sides and top)
Stones, Fossil and Root Fibers, 8" x 6" x 4" (*to see other views of this click on the title)
Acrylic on Claybord, 3 5/8" x 3 5/8"
Subscribe to:
Posts (Atom)